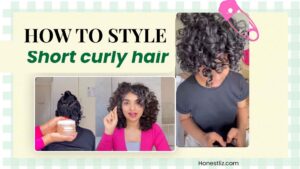
If you have curly hair, you know drying and styling can take effort. But if you want superior definition — especially for coarse curls — finger coiling can change your styling game. It may take a bit more time, but the results? Long-lasting, bouncy curls that hold their shape for days.
Today, we’re taking it up a notch — can you finger coil with foam instead of a cream? Spoiler: YES, and it works beautifully.
What Is Curly Hair Mousse?
Curly hair mousse (aka foam) is a lightweight styling product designed to define curls, reduce frizz, and add volume — all without weighing your hair down. It’s creamy, airy, and perfect for applying on damp curls. You can scrunch it in for a natural look or rake it through for more even distribution.
For a long time, I thought finger coiling only worked with a cream because my coarse hair rejected most other products. But I’ve learned: it’s not the type of product, it’s how you use it. Let’s break it down.
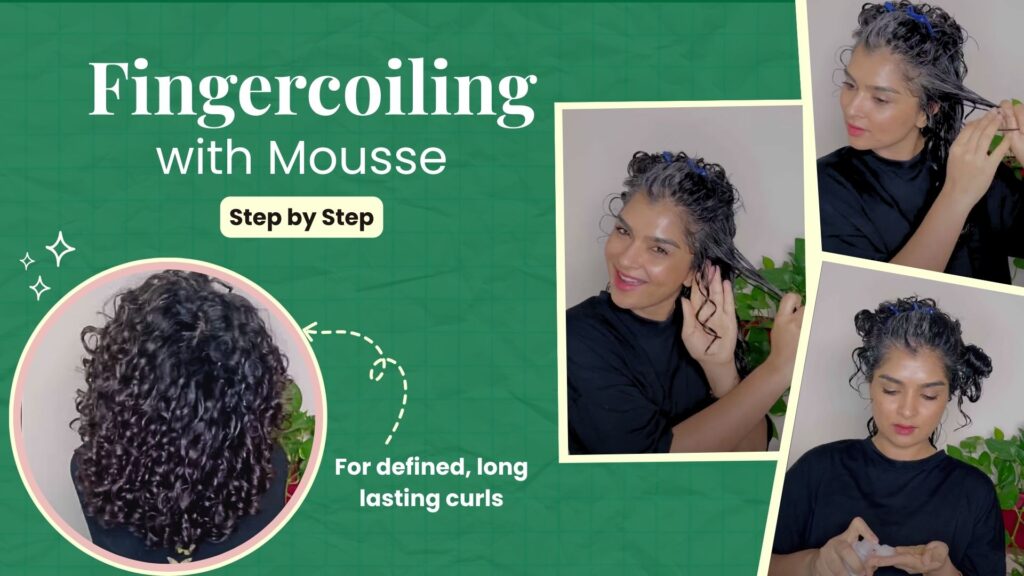
Step-by-Step: How to Finger Coil Using Mousse
Step 1: Start Fresh
Clarify your hair, deep condition, and detangle your hair thoroughly. This is your foundation. Coiling won’t work well on tangled or dry damaged hair.
Step 2: Apply Cream (Optional)
Start with hair cream on wet hair. I have coarse low-porosity hair, with a little bit of highlights. I also have grey hair. All these conditions make my hair feel dry and rough, and so using a hair cream makes sense for me. You can also use a leave-in conditioner if that is what your hair needs.
Step 3: Section Your Hair
Divide your hair into manageable sections. I like splitting it into:
- Bottom Half (to brush-style only)
- Top Half (split into 3 sections: both sides + crown)
This gives you better control, especially if you have thick hair or need more volume at the roots.
Step 4: Add Mousse for Slip
Now apply a mousse like the TreLuxe Curl Defining Mousse to a section. This foam has excellent slip, making the coiling smooth and frizz-free. Start with a small amount — this foam expands as you work with it, so you may not need much.
Step 5: Finger Coil
Take small sections of hair, starting at the root, and wrap them around your finger to form a coil. Work through the section, coil by coil. This helps enhance definition and shape curl clumps more evenly.
Tip: If your curl looks wonky, try coiling it in the opposite direction.
Step 6: Seal With Gel
Lock it all with your favorite gel! I love using TreLuxe H! Definition Gel. You need very little product and it gives you a flexible hold without crunch. Apply it right after coiling to preserve the patttern and holds the definition.
Best Time to Finger Coil?
Always when your hair is wet — either after washing or refreshing with water. Wet hair allows better product slip, less frizz, and better control during coiling.
📝 Additional Styling Tips
- Brush-style the bottom half only for time-saving and length retention.
- Focus on the “money pieces” (front section) to frame your face beautifully — even on refresh days.
- Use a microfiber towel to scrunch out excess water after styling. This speeds up drying without disrupting the curls.
- For extra volume, make sure to lift the top section upward while styling.
- Need a quick refresh? Coil the front few pieces and tie the rest up — instant neat look!
Final Thoughts
Finger coiling with mousse or foam works — especially when you combine a cream for moisture, foam for slip, and gel for hold. This method has helped me stretch definition for days on my thick, coarse curls.
▶️ Watch Finger Coiling Video
Products: Treluxe – SAVE 15% with my aff link
Whether you’re new to finger coiling or looking for faster results, this foam-based routine might be your best styling hack yet!
Want More Curl Confidence?
Curly Hair Product Guide — $12.99
✓ 67 pages of product breakdowns, sample routines, and 60+ tried-and-tested options
Complete Styling Course — $29.99
✓ Includes the Product Guide + Application Mastery styling tips
1:1 Coaching — $97
✓ Tailored solutions, call with me on Sundays only, open worldwide